Once More, With Feeling

Aaaand … we are back.

20191225_064617

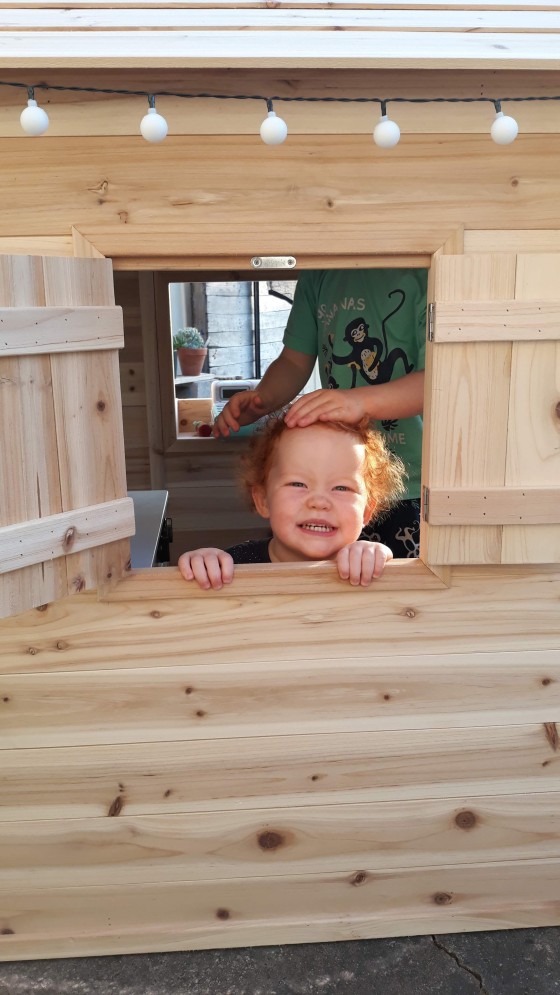
Now our little family is four, adding our daughter Edie to the mix in December 2017. Tyson is still teaching and I am still at home with the kids, working a part-time job in a school library after hours. We still spend a crazy amount of time on food – thinking about it, planning it, shopping for it, cooking it, eating it and cleaning up from it. Unfortunately, the children are not tidy eaters.

Our values remain the same – live simply, eat simply. However, given the current state of our beautiful Earth, we feel the need to make changes in how we do things in our home. Single-use plastic is a plague. Climate change is frightening. The legacy we are leaving is one of destruction and environmental degradation. We have decided that we can no longer continue to do things the way we have always done them if we want our children to be able to live the lives we hope they will live.

We are aiming to dramatically reduce our consumption of resources, especially that of single-use plastics. Our initial goal is to cut our household waste down from one full garbage bin each week to half a garbage bin each week. This might not seem like a big deal, but having two small children means that we will be switching back to reusable nappies and wipes (except overnight), cutting out prepackaged foods as much as possible, and shopping in places that allow us to supply our own reusable containers. This isn’t a big deal when you can shop alone but dragging a two-year-old and a four-year-old to a bulk food store can be a bit of a nightmare. It is important to us though, and modeling these practices to our children is important too.

Thankfully, we have been making positive changes gradually for a long time now. It isn’t as daunting to us when we already have a lot of tools and information that will make achieving our goal much easier.

I’m planning on sharing the changes we are making and the effect it is having on our family. Please note that this will be about progress, not perfection, and that we in no way claim to be zero-waste, low-waste, eco-friendly, green, enviro-warriors or any other label you can think of. We are just a family trying to do the best we can.
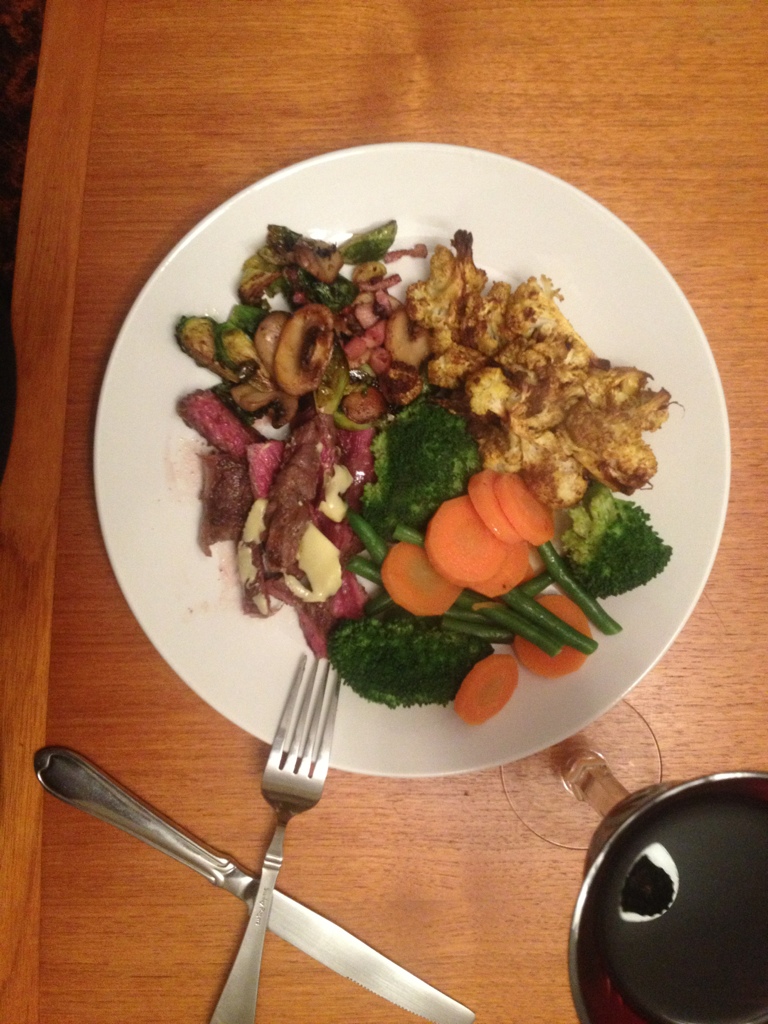
DIY-ing (and a cautionary tale)

I love doing things myself. It makes me feel capable and I get a real sense of satisfaction and achievement from it. When I was teaching Prep, many years ago, my classroom had electric blinds on the outside of the window. We had a recurring issue where one of the wires was loose and the switch for the blind stopped working. Each time it happened we had to get an electrician in. I became really tired of having to wait for the electrician to come, so when he turned up, I surreptitiously watched what he did from my desk. It was a very simple matter and it took about three seconds to correct the problem. So the next time it happened, I took off the switch plate and did what I saw the electrician do. The only difference between what he did and what I did was that I got a teeny tiny little electric shock. When I got myself back together, I put the plate back on and tested out my blinds. They worked. When it happened again, I told the principal and she called the electrician and the whole cycle began again. The moral of the story? DIY is good, but don’t DIY electrical work. That is dumb and you could die. Be patient and leave it to a professional.

Something that I feel great about doing myself (and that isn’t going to result in me getting electrocuted) is making my own food. I love to cook, and I love to make things from scratch. I’m learning to love growing my own vegetables and I’m trying hard to tolerate my chickens. I definitely don’t love my chickens. One of them attacked me when I went in to feed them yesterday and I am still dirty on her about it. They are a both a bit feral.

Today, after 20 days of fermentation, I transferred my Indian-style kimchi* into jars to go in the fridge.

I love this stuff. I have it with scrambled eggs and it makes the eggs so much more interesting. It’s great for the gut, super cheap and super easy to make. When I was working I used to buy it, but a jar like this will set you back anywhere from $7.95 to $13.95 in the shops. I made three and half jars and I think it cost me about $5 in total for the ingredients. I use this recipe and I use this fermenting crock that my awesome Dad gave me for Christmas.

I’ve also started making my own gluten free sourdough (using a recipe from the River Cottage Gluten Free Cookbook). The jars at the back are for Augie’s pumpkin, carrot and quinoa puree that was bubbling away on the stove when I took the photo.

So there you have it. Today’s food DIY, no electric shocks, only deliciousness. Money saving, health promoting and hugely satisfying.

What is your favourite food DIY?

*Now don’t get all mad about me calling it kimchi. I know it’s not legit Korean kimchi. That’s on the cards soon. I just don’t know what else to call it. Feel free to suggest an alternative name if you wish.

Herbs ARE the secret ingredient.

Thats all there is to it.

One of the common themes in the best restaurants I’ve worked in is the use of a lot of fresh herbs.

Get a few flavour combinations under your belt and it will give your food complexity and class.

I think the main reasons that most home cooks don’t use many herbs are that they are expensive, they don’t keep well and they’re time consuming to pick, wash and store.

The best solution is to grow your own. Invest in seeds, pick what you need and there’s no need to wash organic herbs that you’ve grown yourself unless your dog pees on the garden.   I’m no expert on gardening but I reckon now would be a good time to plant your herbs.

We have lemon thyme, Italian flat leaf parsley, rosemary and mint growing in the garden all year round.  We grow basil and chillies in summer and that’s about it.  These herbs are versatile and easy to grow, and we use them in our everyday cooking.

Occasionally I’ll buy some herbs from the shop, but only to let ours regenerate.

If you do buy herbs from the shop it’s a good idea to pick the leaves into a sink of cold water.  It regenerates and washes them at the same time.  Put them through the salad spinner then into a container with dry paper towel on the bottom and damp paper towel on top.  This keeps them fresh and crisp for a surprisingly long time. Make sure you give the leaves plenty of room in the container, if they’re packed too tight they will decompose sooner.

As a general guide, eat lighter herbs (such as coriander, parsley, basil and mint) fresh, in salads or salsas and cook the heaver herbs (such as rosemary, thyme and bay leaves) with meats or roast vegetables.

Put combinations of mint, parsley, dill, coriander and tarragon into your mixed leaves.  Season with salt, lemon juice and olive oil.  Cook meats with butter, thyme or rosemary.  It will add a whole new dimension to your cooking, and is sure to impress.


How I Cook Steak Part 1: Choosing a Steak

Steak is about flavour and nutrition. My goal is to balance both.  In this series of posts I’d like to share my method of cooking steak and tips and tricks I’ve picked up over the years. 
 
For the majority of 2012, I worked at the Ancaster Mill in Canada. It was a fantastic experience, working with some of Canada’s top young chefs.
IMG_0971


Hayley and Bryan Gibson (head chef), hanging out and eating steak.


I think Hayley and I will always remember this night.  Hayley had come to Ancaster to pick me up. The kitchen crew invited her in and we soon started talking meat and wine.  Chef Bryan explained the process of dry aging and told us everything he knew about beef. He grabbed out a slab of dry-aged strip loin (porterhouse), heated up a cast-iron pan and cooked it then and there on the stove top with butter and salt.  While it was resting Maria, the maitre d of the restaurant, brought in a bottle of British Columbia wine she was particularly proud of sourcing, and poured a glass each. Bryan sliced up the steak and we stood around eating it with our fingers. We got to eat the best produce Canada had to offer, chosen by experts in their field, as simple as it gets. Absolutely perfect. Words really can’t explain the generosity and warmth Hayley and I received while at the Mill. They put up with my relentless questions, inane and never-ending conversations about Crossfit / Paleo / food in general and my flighty work schedule.  I learned a lot, and in exchange I let the guys have my old jokes.
 
Part 1: Choosing a Steak.  
My favourite cut of beef is the rib eye (scotch fillet).  It can be purchased whole or as an individual steak, bone on or off.  I think it’s best to buy individual streaks with the bone on, the bone adds flavour and it looks like something out of the Flintstones (which is cool).  Buying individual steaks for a group of people is more work, but the caramelised exterior of a cooked steak is the best part, everyone will thank you for it.   The photo on the right is a 500gm Cape Grim rib eye (notice the marbling), taken while I was working at Backstreet Eating earlier this year.
Generally speaking, the rib eye has more fat within the steak than most other cuts (that’s why I like it). The fat melts and keeps the steak moist while cooking and adds beefy flavour. Regardless of the cut you like, look for nice fat marbling (threads of fat within the meat) and a light cherry colour, not too dark nor too pale. The better quality ingredients you have the less work you need to do to make it taste good.
I don’t know what cut of meat is in the first photo and I don’t know what I was doing.  I do know it looks amazing. The second photo is a striploin (porterhouse) being prepared for service at the Mill.  Thirdly is a nice pare of Canadian eye fillet steaks.  These three photos show the marbling and colour that you are looking for when choosing steak.
IMG_0174Rad Striploin IMG_0830

Of course, it is best to eat organic grass fed beef opposed to grain fed. Dave Aspery from Bulletproof Exec writes: ‘Steers (castrated bulls) can’t make nutritious meat if they aren’t fed the proper ingredients.  If a steer isn’t fed nutritious food, it won’t become nutritious food.  There is no magical transformation from stale gummy bears (part of the feedlot diet) into vitamins, minerals, and healthy fats.  Feeding cattle junk food turns them into junk food.’  You can find the article this quote was taken from here – its well worth a read, actually, anything Dave Aspery writes is worth a read.

Once you choose your steak and take it home, I recommend giving it some age. Part 2 in the How I Cook Steak series: Ageing Beef.

It’s A Cookie Kind Of Day

It’s miserable outside. Drizzly, cold and grey. When the weather is like this I crave three things – hot drinks, good books and fresh-out-of-the-oven biscuits. I must have been preparing for this subconsciously – I absentmindedly picked up some organic dark chocolate chips while running the gauntlet that is Terra Madre on a Saturday morning. So when the longing for a warm baked sweetie knocked on the door of my brain, I was ready.

I waded through about a zillion websites, trying to find a grain-free, low-sugar recipe that didn’t look like balls. It took a while. Just when I thought I’d found a good one it would include something completely whack or the comments would annihilate the recipe and it’s maker.

Eventually, I found one that sounded pretty good and tried it out. You can find it here. I made a few changes (added extra choc chips; halved the recipe because I WILL eat that many cookies if they are around; subbed coconut sugar for palm sugar and cut it by a half as the coconut flour I use is quite sweet already) and they came out great … although I was not paying attention towards the end, and the cookies came out a little browner than I would have liked. But they taste lovely, have a nice texture and are just the way I like my choc-chip cookies – thick with a soft inside and slightly crisp on the outside.

20130720-161352.jpg

Now the heater is on, I have a full tummy and all is well in the world. Happy cookie day!

Lemon and Blueberry Cheesecake

After a delicious dinner of pulled pork and roasted vegetables, Tyson was saying how much he would like a lemony dessert (hint, hint). We argued a bit about making apple crumble – I really wanted to try out a pie or tart base and he just wanted the usual crumble we often eat for breakfast. BORING.

At the same time, we turned to each other and said ‘Don’t we have some cream cheese in the fridge?’

It was a bit weird. So we took it as a sign. Lemon cheesecake all around. I made one, loosely based on this recipe.

My normal recipe disclaimer applies – this is how I made it. I’m not a recipe tester or pastry chef, and I’m not saying this recipe is perfect. It might not work for you. It might be too dry, or too moist, or too crumbly. You might think it tastes like crap. I made it and I liked it and this is how it was done.

Filling

250g full fat cream cheese

3 teaspoons of honey

1 egg

zest and juice of one lemon

blueberries

Crust

120g almond meal

70g melted butter

Method

Put the ingredients for the filling (except for the blueberries) into a food processor and blend until smooth. Taste it, and add more honey or more lemon as you like. Go nuts and add some vanilla if it makes you happy.

Mix the almond meal into the butter until it makes a thick paste but is not too dry. If it is too dry, add more butter. If it is too wet, add more almond meal. Press into your cheesecake receptacle (I used a tart case) all the way to the edges.

Pour the filling onto the base and spread out evenly. Try not to eat too much of the filling mix or your cheesecake will be too skinny.

OLYMPUS DIGITAL CAMERA

Artfully arrange the blueberries onto the top of the filling.

Bake at 180 degrees until it looks ready, light brown around the edges but not burnt. Mine took about 45 minutes.

OLYMPUS DIGITAL CAMERA

While the cheesecake is baking, lick every utensil you used to move that filling around, then use a spatula to scrape out the last tiny bits of filling that are in the food processor and lick that too. Don’t be a clown and try to lick the blades of the food processor, it will only end in tears. That’s how good the filling should taste.

Here is the hardest part. Once it is out of the oven, you are going to have to wait for it to cool. If you don’t, the base will crumble and the filling will be too gooey. It’s going to need to spend some time in the fridge. When it is cool and set, it is ready to eat. Enjoy!

cheesecake slice

On Bringing Your Own Food (You Weirdo Hippie)

I’m a teacher. One of the questionable perks of the job is the fun activities that you get to do. This morning I am heading off to the funnest of the fun activities – school camp.

Now, don’t be fooled. Despite what our delightful former premier tells you, it’s a little bit more than a normal working day. We are on duty twenty four hours, from the time the kids get to school to the time we deliver them back to the welcoming arms of their parents. If a kid starts vomiting in the middle if the night, we sit up with them. If they have nightmares, or wet the bed, or miss their families, we soothe them. But despite those things, camp is fun. I like camp. And I especially like this camp because we get to ride bikes all day.

What I don’t like about camp, apart from watching thirty prepubescents spend five dollars each on lollies and the shenanigans that follow with the subsequent sugar highs and crashes, is the camp food.

It wouldn’t be bad to most people. Pretty much your run of the mill stuff, spaghetti bolognaise, cereal, toast… But if I ate that, things would go seriously wrong. My energy levels would be all over the place, I’d feel sick and cranky. What’s a girl to do?

When I agreed to go to camp, I kind of forgot about the food. My dear friend Nat is the camp coordinator, and while organising the camp paperwork, she came across the section for dietary requirements. I’m sure she looked at it and thought ‘Oh shit, here we go.’

It got me thinking. What are my requirements? First and foremost, no gluten or sugar. That’s the bare minimum I could cope with. Preferably, no processed food, refined carbohydrates, sugar or low fat anything. It’s a big ask. So I decided to take my own. Two breakfasts, three lunches and two dinners.

Three hours in the kitchen last night and I was good to go. Here’s my camp food…

20130624-121022.jpg

Apple crumble and coconut milk for breakfast, zucchini and sweet potato frittata and salad for lunch, Spanish meatballs and vegies for dinner.

Steady energy, steady mood, feeling good – bring on the bike rides!